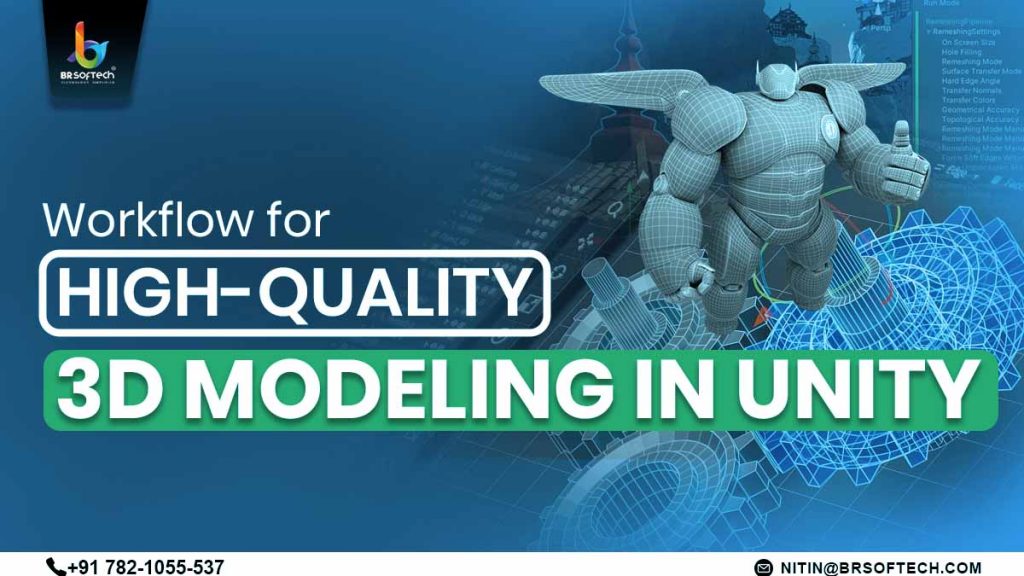
With time, Unity has introduced many versions in the gaming industry. It is known as one of the most powerful and most used game engines among developers which offers great support for the 3D content creation. In today’s time, a 3D model is used in every domain. From the game perspective developing games, simulations, or VR experiences, having a robust 3D modeling workflow ensures high-quality assets and prevents performance issues. This guide explores the essential steps to achieve professional-grade 3D modeling within Unity and with third-party tools.
Table of Contents
Understanding Unity’s 3D Modeling Capabilities
No doubt 3D modeling is in trend. What makes it most likable among people is its built-in tools and features, which make this 3D modeling more popular among the people. Tools like Pro Builder are a versatile in-editor modeling tool for quick prototyping and level design. Another tool is Unity’s modeling mode which allows direct editing of mesh components. The last one is the Shader Graph and Material which is excellent for enhancing model appearance through custom shaders and textures.
Limitations of modeling solely within Unity
Everything that has ultimate features comes with some limitations. Below are a few of the limitations of 3D modeling that one needs to know. Limitations like a lack of advanced sculpting and texturing tools, and less precise control compared to dedicated modeling software, though it is more suited for prototyping rather than high-quality asset creation.
Utilizing ProBuilder and Unity’s Native Tools
Below is a brief description of ProBuilder, this tool, its features, and more. So without further ado let’s start exploring.
Introduction to ProBuilder for In-Editor Modeling
ProBuilder is Unity’s built-in modeling tool that allows users to create and refine 3D meshes without needing external software. It provides a flexible and efficient way to build assets directly within the Unity editor, reducing the need for frequent back-and-forth between different software programs. Some of the key benefits of these tools are. ProBuilder allows for easy shape creation, enabling users to place walls, floors, and objects in seconds. The best part is users can iterate on designs in real-time within Unity, testing how assets look and function within the game environment. It also supports mirroring and symmetry functions, which help maintain uniformity across the model.
Basic and Advanced Techniques Using Unity’s Modeling Mode
There are various basic and advanced techniques using Unnity’s modeling mode, below is the table which will give you a brief description of these techniques.
Basic Techniques
Advanced Techniques
Creating and Editing Primitive ShapesUse basic 3D shapes like cubes, spheres, and cylinders as building blocks. Adjust scale, rotation, and position within Unity.
Working with UV Maps Inside UnityUV mapping determines how textures are applied. Unity provides basic unwrapping, but external tools like Blender offer better control.
Extruding FacesPull out faces to create additional geometry. Useful for making walls, staircases, and extending models.
Deforming MeshesModify vertices, edges, and faces to bend, twist, or stretch objects. Essential for creating organic shapes, terrains, and animated objects.
Modifying Vertices, Edges, and FacesMove vertices to refine shapes, insert edge loops for smooth deformations, and delete/merge faces to optimize geometry.
Utilizing Edge Loops to Enhance DetailStrategically place edge loops to improve mesh topology. Essential for smooth character animations and defining curved surfaces.
Integrating Third-Party 3D Modeling Software
Creating a captivating and high-quality 3D model requires powerful tools like Blender, Autodesk Maya, and Autodesk 3ds Max are mostly used in creating almost every 3D model.
Blender
It is one of the free and open-source 3D creation suites that has gained high popularity among indie developers and professional artists. It offers a variety of features, including polygonal modeling, sculpting brushes, procedural modeling, and advanced rigging and animation tools. Its Cycles and Eevee render engines provide high-quality, real-time, and offline rendering, along with an extensive library of add-ons contributed by its vast community.
Autodesk Maya
It is one of the great 3D modeling, animation, and rendering software highly used in the film, gaming industries, and television. It is known for its powerful animation and rigging tools, including motion capture, keyframe animation, and procedural animation. Maya also provides robust character rigging capabilities, advanced skin weighting, and blend shape functionalities. With built-in FX simulation tools for fluid dynamics, cloth effects, and particle animations, Maya is favored by studios working on AAA game titles and cinematic projects. Additionally, its seamless integration with game engines like Unity and Unreal Engine ensures efficient asset export and optimization, making it a top choice for high-end productions.
Autodesk 3ds Max
Autodesk 3ds Max, another industry-standard software, is widely used for game development, architectural visualization, and motion graphics. It offers advanced polygon and NURBS modeling techniques, procedural workflows, and a modifier-based system that allows non-destructive editing. 3ds Max is compatible with industry-leading rendering engines such as V-Ray, Arnold, and Corona, making it a go-to tool for creating photorealistic environments.
Workflow for Preparing and Importing Models into Unity
There is a structured way to prepare and import the model into Unity. Steps like modeling and sculpting, texturing, and UV mapping, exporting, importing are some of the ways that are responsible for creating a 3D model.
Modeling and Sculpting
The first step in preparing 3D models for Unity is creating the base asset using third-party software such as Blender, Maya, or 3ds Max. During this process, it’s essential to ensure clean topology, proper edge flow, and well-defined geometry.
Texturing & UV Mapping
After modeling, the next step is applying textures and setting up UV maps. UV unwrapping is crucial for proper texture placement, ensuring that the texture aligns correctly with the 3D model. Artists can use software like Substance Painter, Photoshop, or built-in tools within Blender and Maya to create realistic or stylized textures.
Exporting
Once the model and textures are finalized, they need to be exported in a format compatible with Unity, such as FBX, OBJ, or GLTF. The FBX format is the most commonly used because it supports animations, materials, and multiple meshes within a single file. It’s essential to ensure that the scale, transformations (position, rotation, and scale), and file structure are properly set before exporting to avoid issues in Unity.
Importing into Unity
Importing the model into Unity is straightforward, drag and drop the exported file into Unity’s Assets folder. Unity automatically detects textures, materials, and animations if properly set during export. Within Unity, adjustments may be needed for material assignments, normal maps, and shader compatibility, ensuring the model appears as intended.
Optimization & Testing
The final step involves optimizing the asset for performance. This includes applying Level of Detail (LOD) settings to reduce polygon count at varying distances, using Occlusion Culling to remove unseen objects from rendering, and testing the asset within different lighting conditions and camera perspectives. Ensuring proper performance on targeted platforms (mobile, PC, VR, or AR) is crucial before finalizing the asset for deployment.
Optimizing models for developing games using Unity is crucial to ensure smooth performance across different platforms. This involves reducing polygon count, optimizing textures, and using efficient materials to balance quality and performance. Techniques like retopology, LODs (Level of Detail), and texture baking help enhance real-time rendering without compromising visual fidelity.
Retopology: Converting High-poly Models to Optimized Meshes
Retopology is the process of restructuring high-polygon models into low-poly versions while maintaining their essential shape and details. High-poly models, often created through sculpting or CAD software, contain excessive geometry that can slow down real-time rendering in Unity. By converting these models into optimized meshes, developers can significantly enhance game performance while preserving visual quality. Retopology ensures that the model retains its silhouette, allowing it to appear high quality without unnecessary computational overhead.
Techniques for Reducing Polygon Count Without Sacrificing Quality
There are mainly three steps to reduce polygon count without sacrificing quality, these steps include decimation in Blender, Baking High-Poly Details, and Manual Retopology, which are used to do this process.
Decimation in Blender
It allows users to reduce polygon count while retaining the overall structure of the model. This technique is particularly useful for assets that do not require intricate edge loops or deformation, such as environmental props or static objects. However, excessive decimation can lead to visible artifacts, so it should be applied carefully while monitoring model integrity.
Baking High-Poly Details
A common practice in game development is baking high-poly details into texture maps, such as normal maps, ambient occlusion maps, and displacement maps. Instead of using dense geometry to represent surface details, a low-poly model can simulate high-resolution features using these baked textures. Tools like Substance Painter, Marmoset Toolbag, and Blender’s baking tools help transfer intricate sculpted details onto optimized meshes, ensuring visual fidelity without performance costs.
Manual Retopology
For characters, complex props, or deformable objects, manual retopology is often necessary. This involves manually creating a new, optimized mesh over the high-poly model using clean edge loops and quads for better animation deformation. Software like Blender, Maya, and 3ds Max provides dedicated retopology tools, such as Quad Draw in Maya or Remesh & RetopoFlow in Blender, to help artists craft optimized meshes with efficient topology.
Texturing and UV Mapping
This is one of the most important steps to perform while creating a 3 model. So without further ado let’s understand this in detail.
UV Unwrapping Techniques and Software Options
UV WNwrapping is the process of projecting a 3D model’s surface onto a 2D plane for texturing. Popular tools for UV unwrapping include Blender, Maya, 3ds Max, and Substance Painter. Techniques such as automatic UV mapping, manual UV unwrapping, and UDIM workflow help ensure textures are properly aligned with minimal distortion.
Methods to Create Realistic or Stylized Textures
Textures define the look and feel of a model, whether realistic or stylized. Artists use hand-painted textures, procedural textures, and physically-based rendering (PBR) textures to achieve different styles. Software like Substance Painter, Photoshop, and Quixel Mixer enables artists to create high-quality textures with detailed surface properties.
Tips for Creating Efficient Material in Unity
There are mainly 3 tips which are mentioned below for creating a good model in Unity. Let’s get to know each other in depth.
Use texture atlases to combine multiple textures into a single material, reducing draw calls.
Optimize shader complexity to balance performance and visual quality.
Leverage PBR Workflows to create materials that react realistically to lighting and shadows.
Use baked lighting where possible to reduce real-time calculations.
Limit the use of transparency as transparent material requires additional rendering passes and impacts performance.
All About Rigging, Skinning, and Animation
Below is the structure table which will give you a brief description of these. Let’s understand in deep.
Category
Description
Best Practices & Tools
Rigging
Creating a skeletal structure for a 3D model to enable animation. Includes techniques like Inverse Kinematics (IK), Forward Kinematics (FK), and Blend Shapes for facial expressions.
– Use HumanIK (Maya), Rigify (Blender), and CAT (3ds Max) for efficient rigging.- Maintain a clean hierarchy to avoid animation glitches.- Use IK for natural limb movement and FK for precise control.
Skinning
Binding the model’s mesh to the skeleton so it deforms correctly during animation. Involves weight painting and vertex assignments.
– Use proper weight painting to distribute bone influences evenly.- Limit bone influences per vertex to avoid computation overhead.- Apply corrective blend shapes for natural deformations.
Animation
Creating movement for characters and objects. Includes keyframe animation, motion capture, and procedural animation.
– Import animations as FBX files into Unity.- Use Unity’s Animator Controller for blending and transitioning animations.- Utilize animation retargeting to reuse animations across different character rigs.- Fine-tune animation curves for smoother motion.
All About Lighting, Rendering, and Post-Processing
Lighting, rendering, and post-processing are the steps that take place at the end; however, they are important as they finalize the actual look of the model.
Setting Up Lighting and Shadows for a Realistic Appearance
Lighting improves the realism of a scene. Unity provides real-time lighting, baked lighting, and global illumination (G) techniques. Using directional lights, point lights, and area lights, artists can simulate natural and artificial light sources.
Choosing the Right Rendering Pipeline (Built-in, URP, HDRP)
Built-in Render Pipeline is best for older projects and simple workflows. While the universal render pipeline (URP) is optimized for mobile and lightweight applications. And high-definition render pipeline is ideal for high-fidelity visuals in AAA games and cinematic experiences.
Post-Processing Techniques to Enhance Visual Quality
Post-processing effects such as bloom, ambient occlusion, depth of field, and color grading enhance the final look of a scene. Unity’s post-processing stack allows developers to fine-tune these effects for improved visual appeal.
Converting 2D Assets into 3D Models
By analyzing multiple images of an object, photogrammetry transforms 2D images into 3D models. It uses software like RealityCapture, Agisoft Metashape, and Mushroom to automate the process for high-detail scans. Within Unity, converting 2D assets into 3D involves techniques such as sprite-to-mesh conversion, extrusion, and shader-based effects. However, challenges like texture stretching, model accuracy, and performance optimization must be addressed to ensure high-quality results.
Conclusion
Every process needs patience and requires the right software, optimizing models, creating textures, and setting up animations with careful planning. Techniques like proper retopology, material optimization, and efficient lighting enhance the final output. As technology advances, AI-driven modeling tools, real-time ray tracing, and procedural generation are shaping the future of 3D content creation in Unity, especially for VR/AR and real-time applications.
If you are looking to create your captivating 3D modeling in Unity, then you can consider BR Softech as your helping hand.
Frequently Asked Questions (FAQ)
Q1. Can I create a 3D model directly in Unity?
Ans. Yes, you can create a 3D model, as it provides tools like ProBuilder for in-editor modeling and Shander Graph for material customization, however, for complex modeling, third-party software is recommended.
Q2. How do I optimize 3D models for better performance in Unity?
Ans. Optimizing techniques includereducing polygon count, using LOD (Level of Detail) models, baking high-poly details into normal maps, and combining textures using atlases to reduce draw calls.
Q3. What is the best file format for importing 3D models into Unity?
Ans. FBX is the most recommended format as it supports animations, materials, and multiple meshes. Other formats like OBJ, GLTF, and DAE are also compatible but may require additional adjustments.
Q4. How do I create realistic lighting and shadows in Unity?
Ans. You can use different lighting like real-time lighting, baked lighting, and global illumination (GI) to simulate realistic lighting. Selecting the appropriate rendering pipeline (Built-in, URP, HDRP) also impacts lighting quality.
I am Nitin Garg, founder of BR Softech PVT LTD - an award-winning mobile game development company known for its excellence in the gaming domain. We have a team of 180+ exceptional professionals & we have a satisfied clientele of 2.7k+ globally. Driven by an entrepreneurial spirit, I aim to elevate BR Softech to a billion-dollar company.